
If you choose to go for a repair with the use of normal methodology then it always requires you to spend extra time, and then to pick up all minute parts from a cracked display screen of iPhone 5 is quite a hectic task. What if we can give you an idea as how to replace a broken iPhone 5 screen with an easy way? Anyone with a limited experience over DIY can do it with quite an ease. Go for the easy way solutions and just relax as instant shattering o screen causes lots of anxiety.
How You Can Ease Out Your Changing Options
The method over which we are going to focus will let you to get through a phase of screen change with pre-installed small parts or components. These are already attached with the installed so you don’t have to take tension over that matter. With traditional methods of change, you need to transfer all of these parts over. By using the instructions and to fix the parts in a guide, these will be pre-installed as a normal action. It is time for you to take a decision what sort of change for broken iPhone 5 screen suits you. The price difference doesn’t matter a lot but our way will solve your issue in an easy way.
These pre-installed iPhone components are mentioned for better understanding.
- LCD Shield Plate
- Front Camera
- Earpiece Speaker
- Home Button Bracket
- Earpiece Bracket
- Home Button with Rubber Gasket
- Home Button Flex
- Front Camera with Induction Flex Cable Assembly
1- Buy the Discounted Parts
The usual repair method adopted by iPhone 5 DIY needs you to transfer all the small parts from the cracked display to new, but you can buy the small or big components from eBay or Amazon with an ease. Try the discounted options and buy the iPhone tool kit and a razor blade if necessary. The color of screen depends on your choices either black or white.
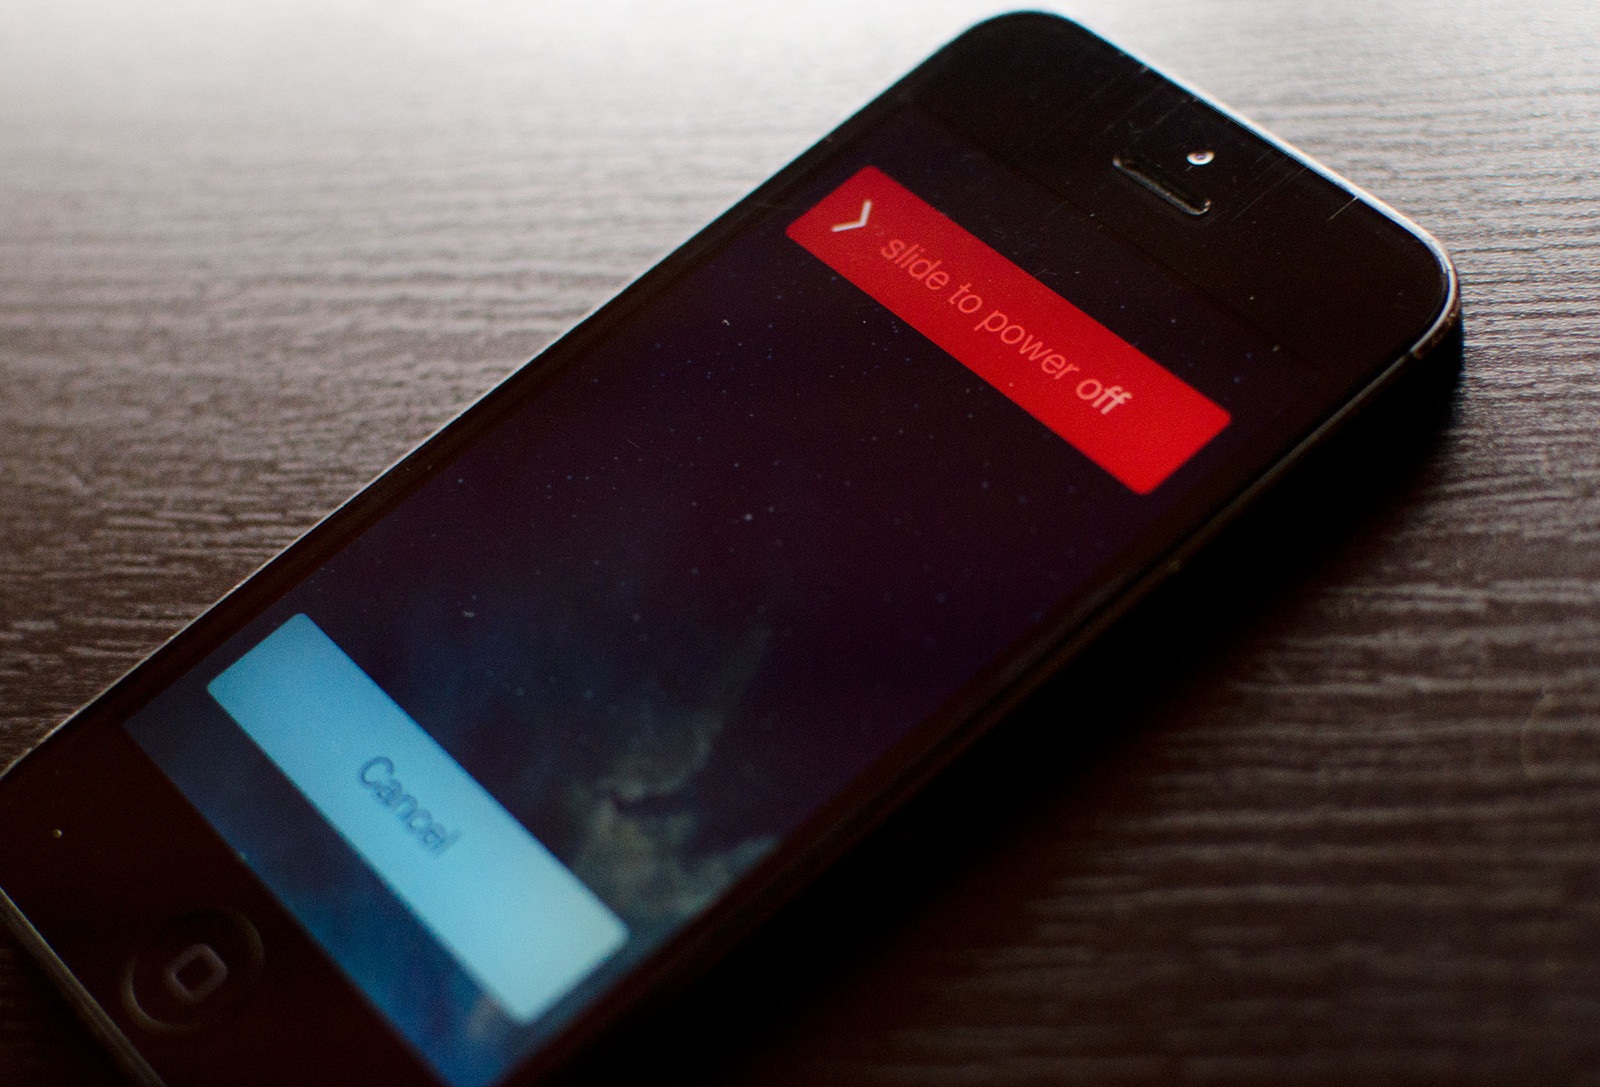
2- Switching Off the Phone First
It is highly recommended to switch off your phone before going on for an operation named Screen Change. Swipe for off option and as to safeguard the software.

3- How to Remove Old Shattered Screen
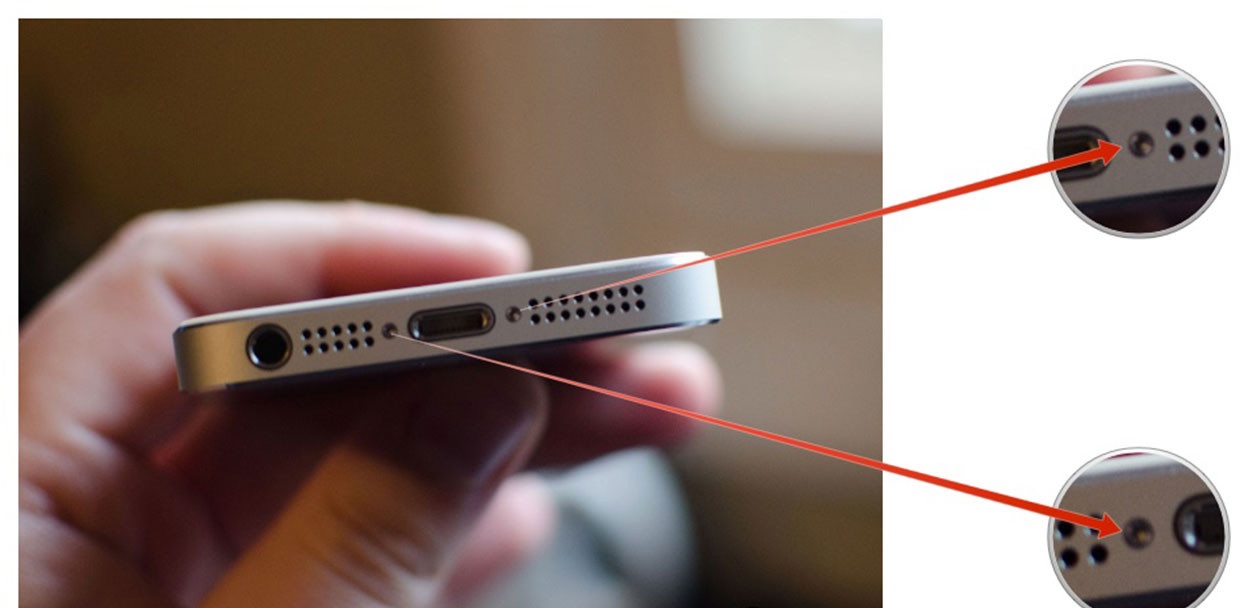
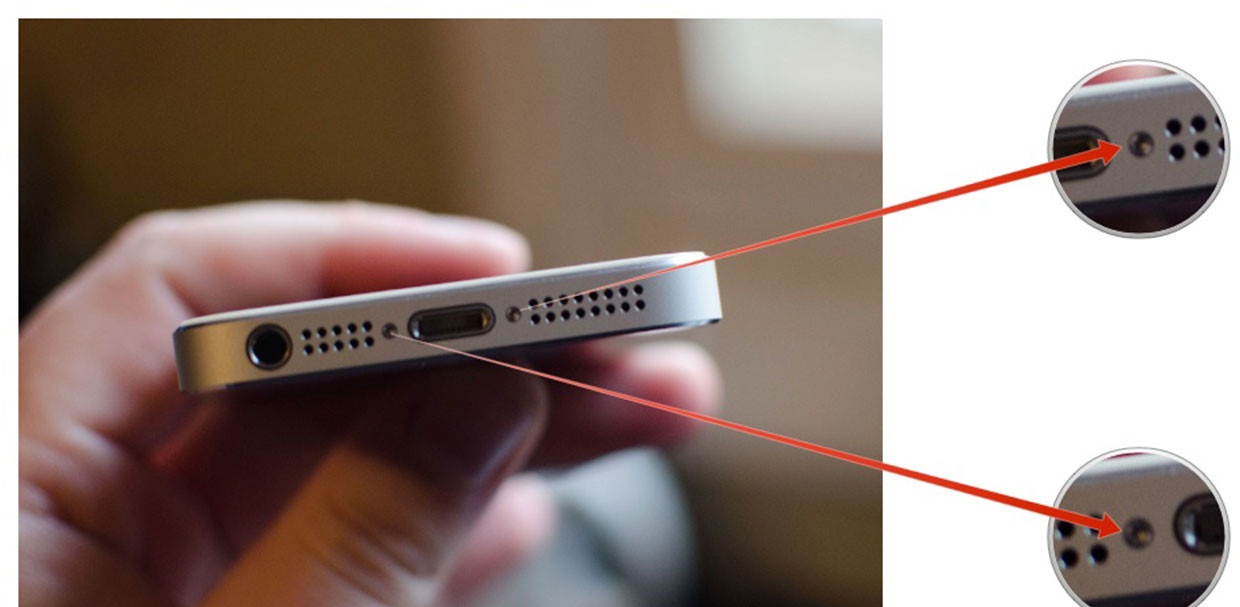
- It is best to use the security screwdriver as a way to remove 2 screws at the bottom of the iPhone 5 on both sides of dock.

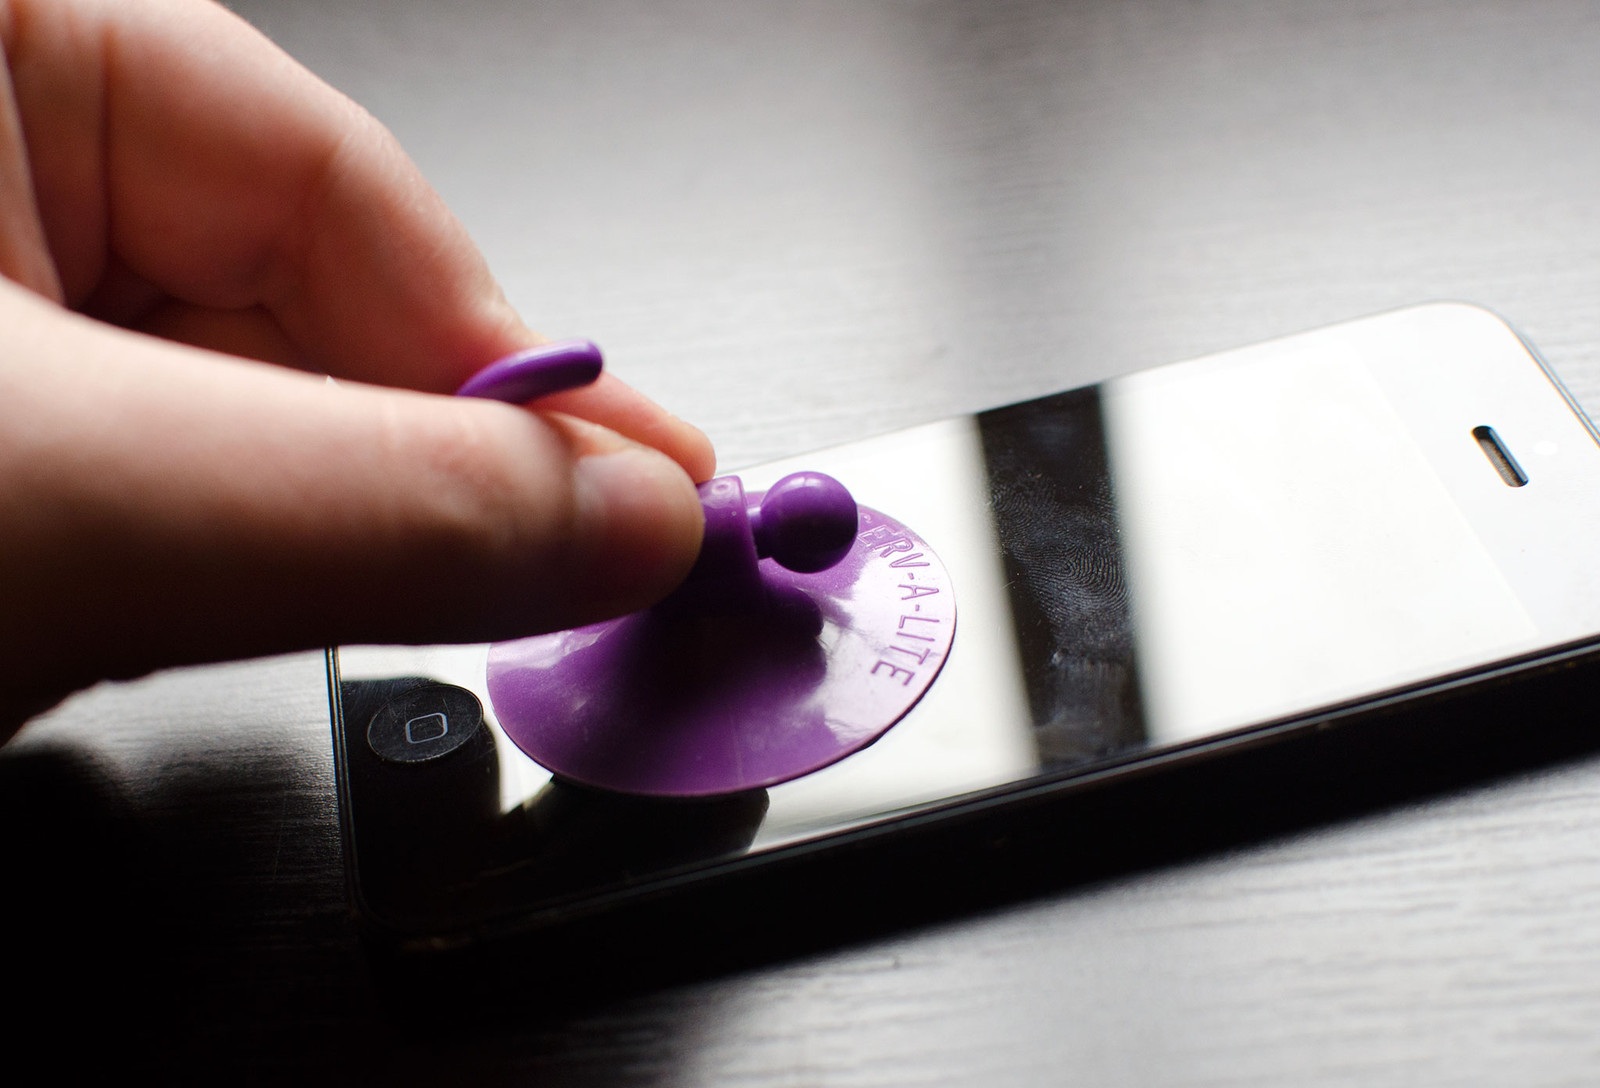
- Keep the suction cup just above the Home button and slowly move to the bottom. Do not to pull the whole screen off as it is attached to multiple cables. First release the ‘bottom portion’.

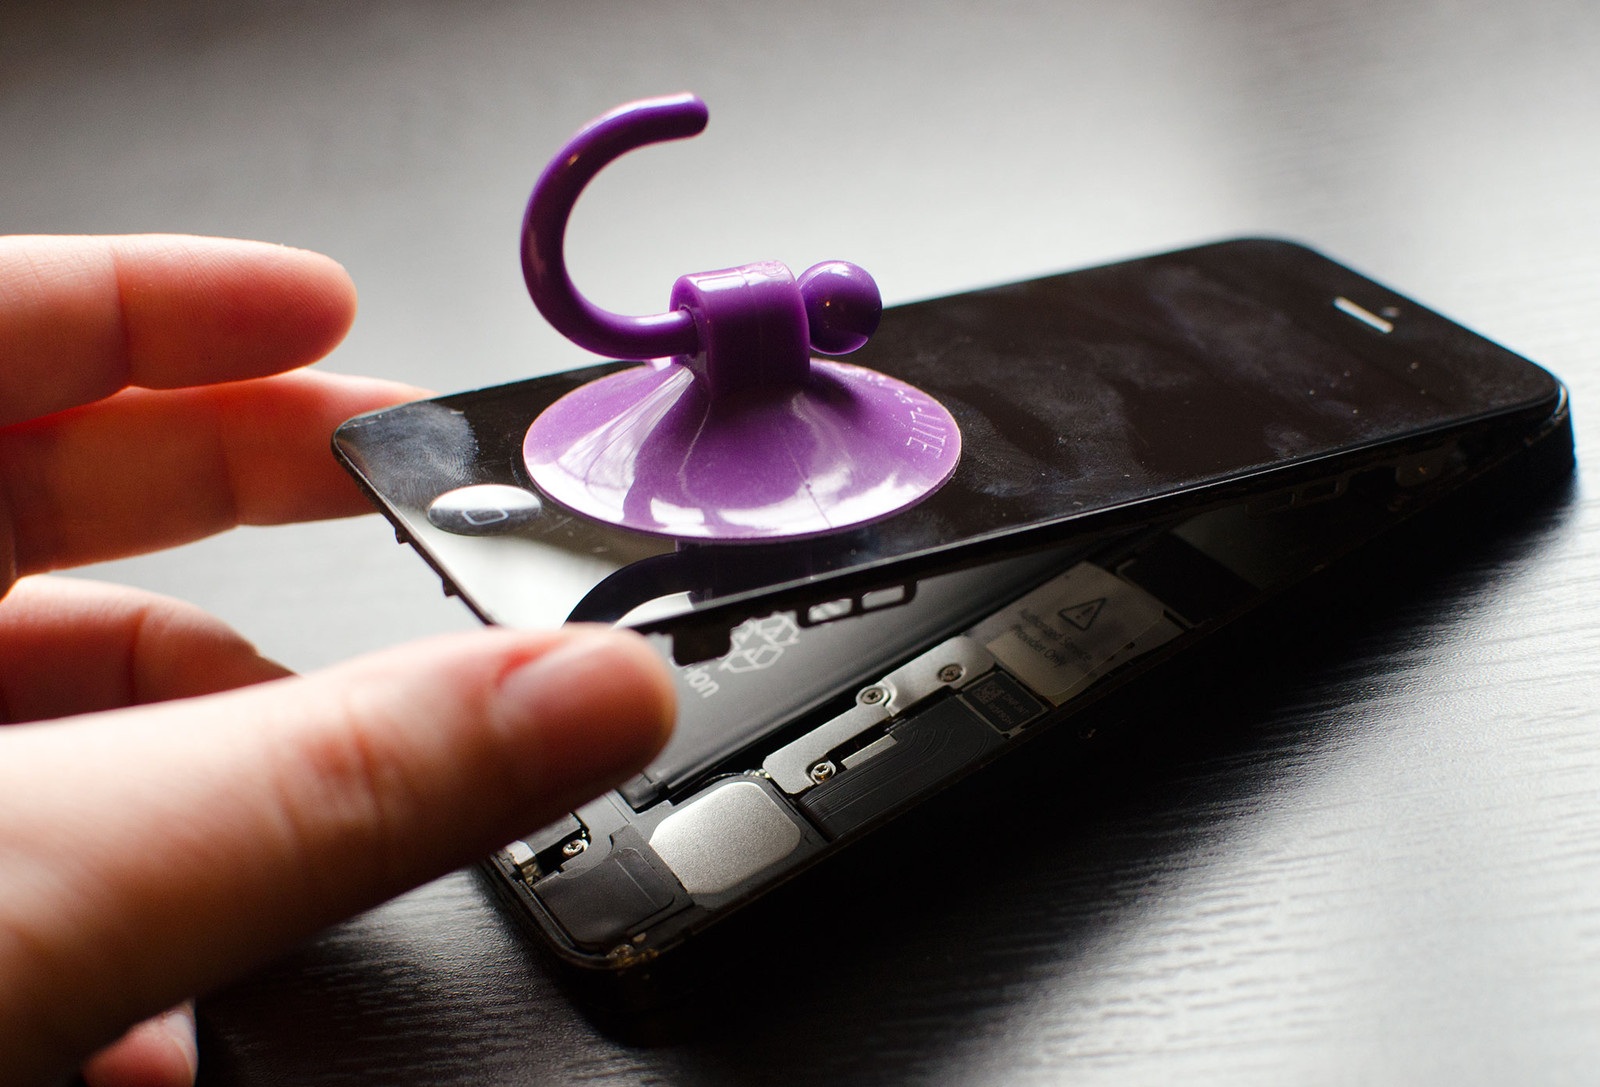
- When the whole screen is free from phone, move for the hold of attached cables with the shield
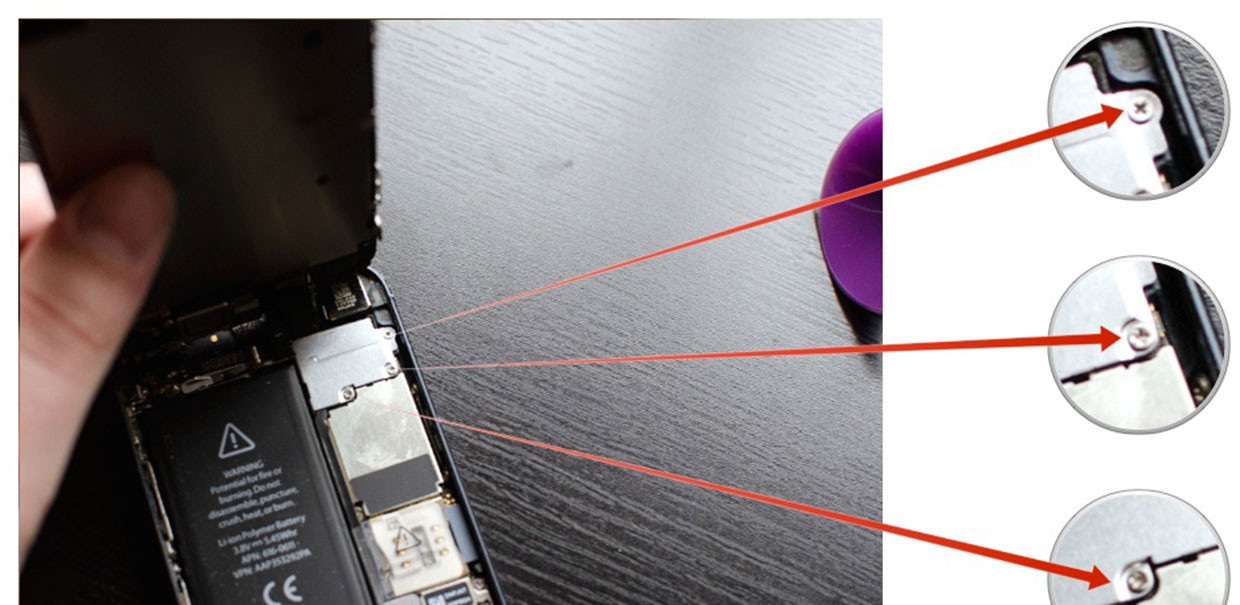

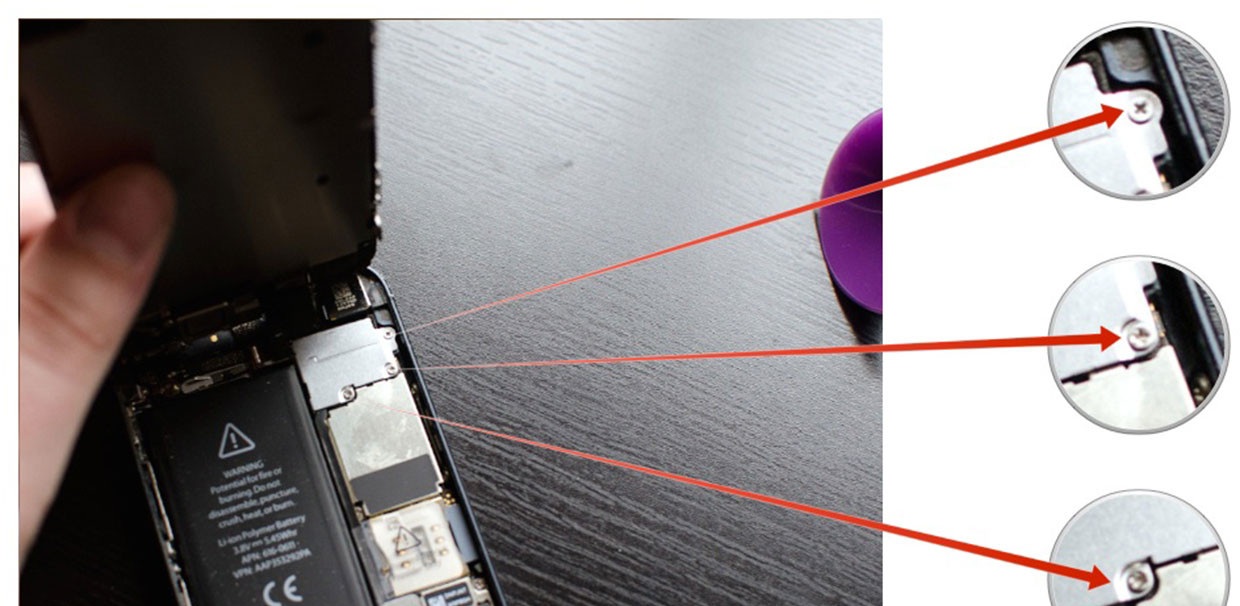
- It is time to use#000 screwdriver designed to remove the three screws by holding the display shield downwards.
- Keep the shield around but the screws must not be mixed.
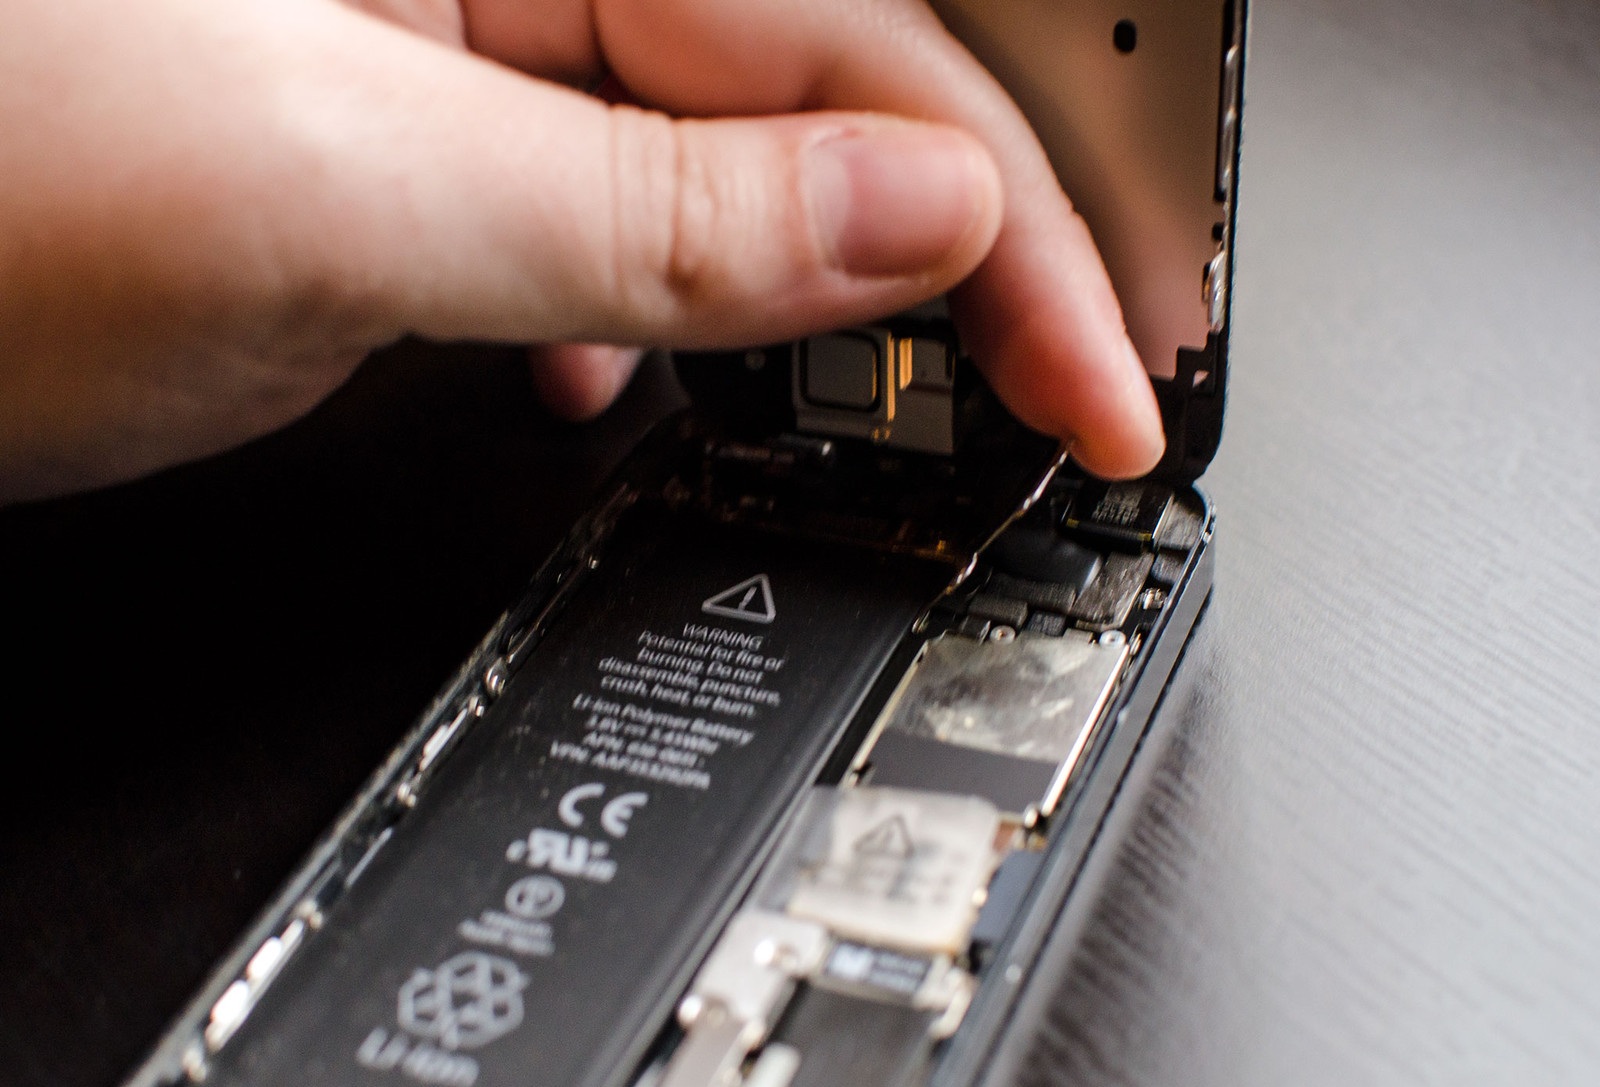
- Here is a need to usespudger tool to seperate three cables that attach the display to the board.
- The display needs to be free from the device.


- You will only see two of the cables but the third is underneath. The third one usually pops up on its own when you remove the first two.
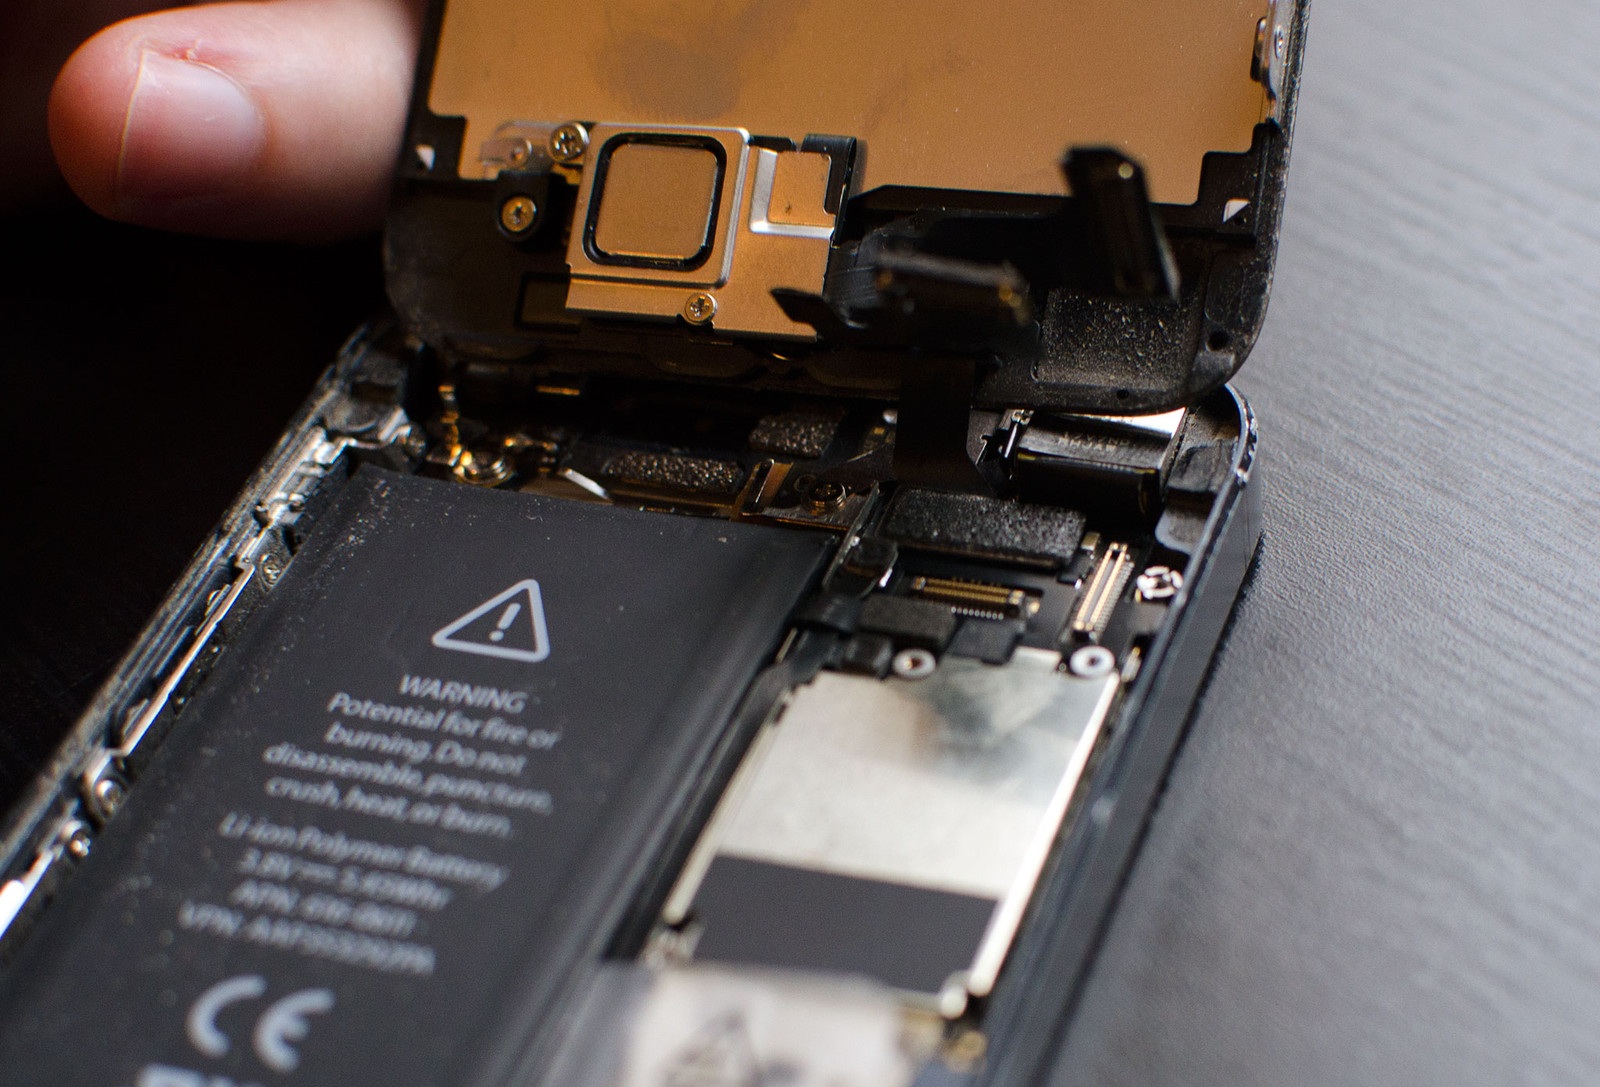
4- New Screen Installation
You need to attach the separated three cables with the new logic board of the screen you have purchased.
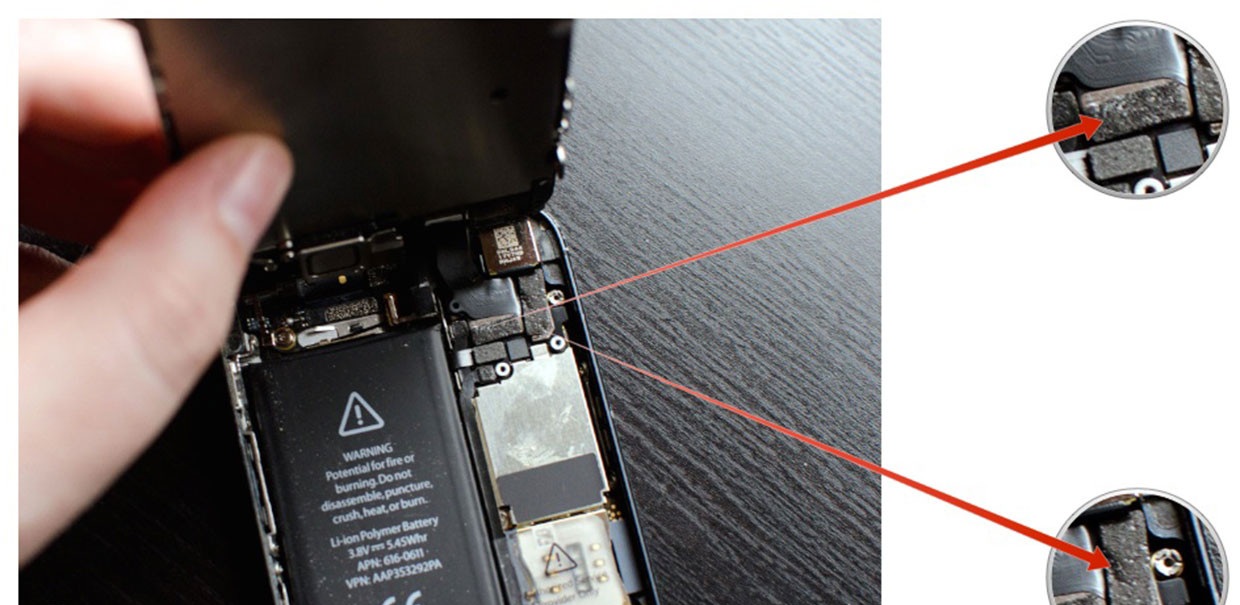
- Now replace the display shield and then the three screws which you have already removed.
- Now you need to drag the display very smoothly starting from the top (never try to push the whole screen down at one otherwise it will be damaging.
5- Replacement of Dock Screen
- Now use the security screwdriver to replace the two screws going to be placed at both sides of lower dock.

6- Testing the New Screen
Now you need to check the sensitivity and the functionality of a new screen.

Browse and then tap over it as much again and again. Check the cameras both front and rear. The next phase is to look at the speakers and if the earpiece is working fine. If it is the case then you are on a go to use it instantly. How easy it all stays to let you change the whole new screen of iPhone 5. Good luck and enjoy your phone….!!
Author Bio: This article is published by Sara Jim who is technical manager at mobilerepairs4u.co.uk which is one of the top well reputed mobile repairing companies in UK


